Important: If you cannot see the download button to export data you will need to ask the Medical Tracker Administrator of your school to update the permissions of the team your user belongs to. Please click here to find out how to enable this permission.
Within each module in the top right corner, a download button allows you to export the data you have filtered within that particular module.
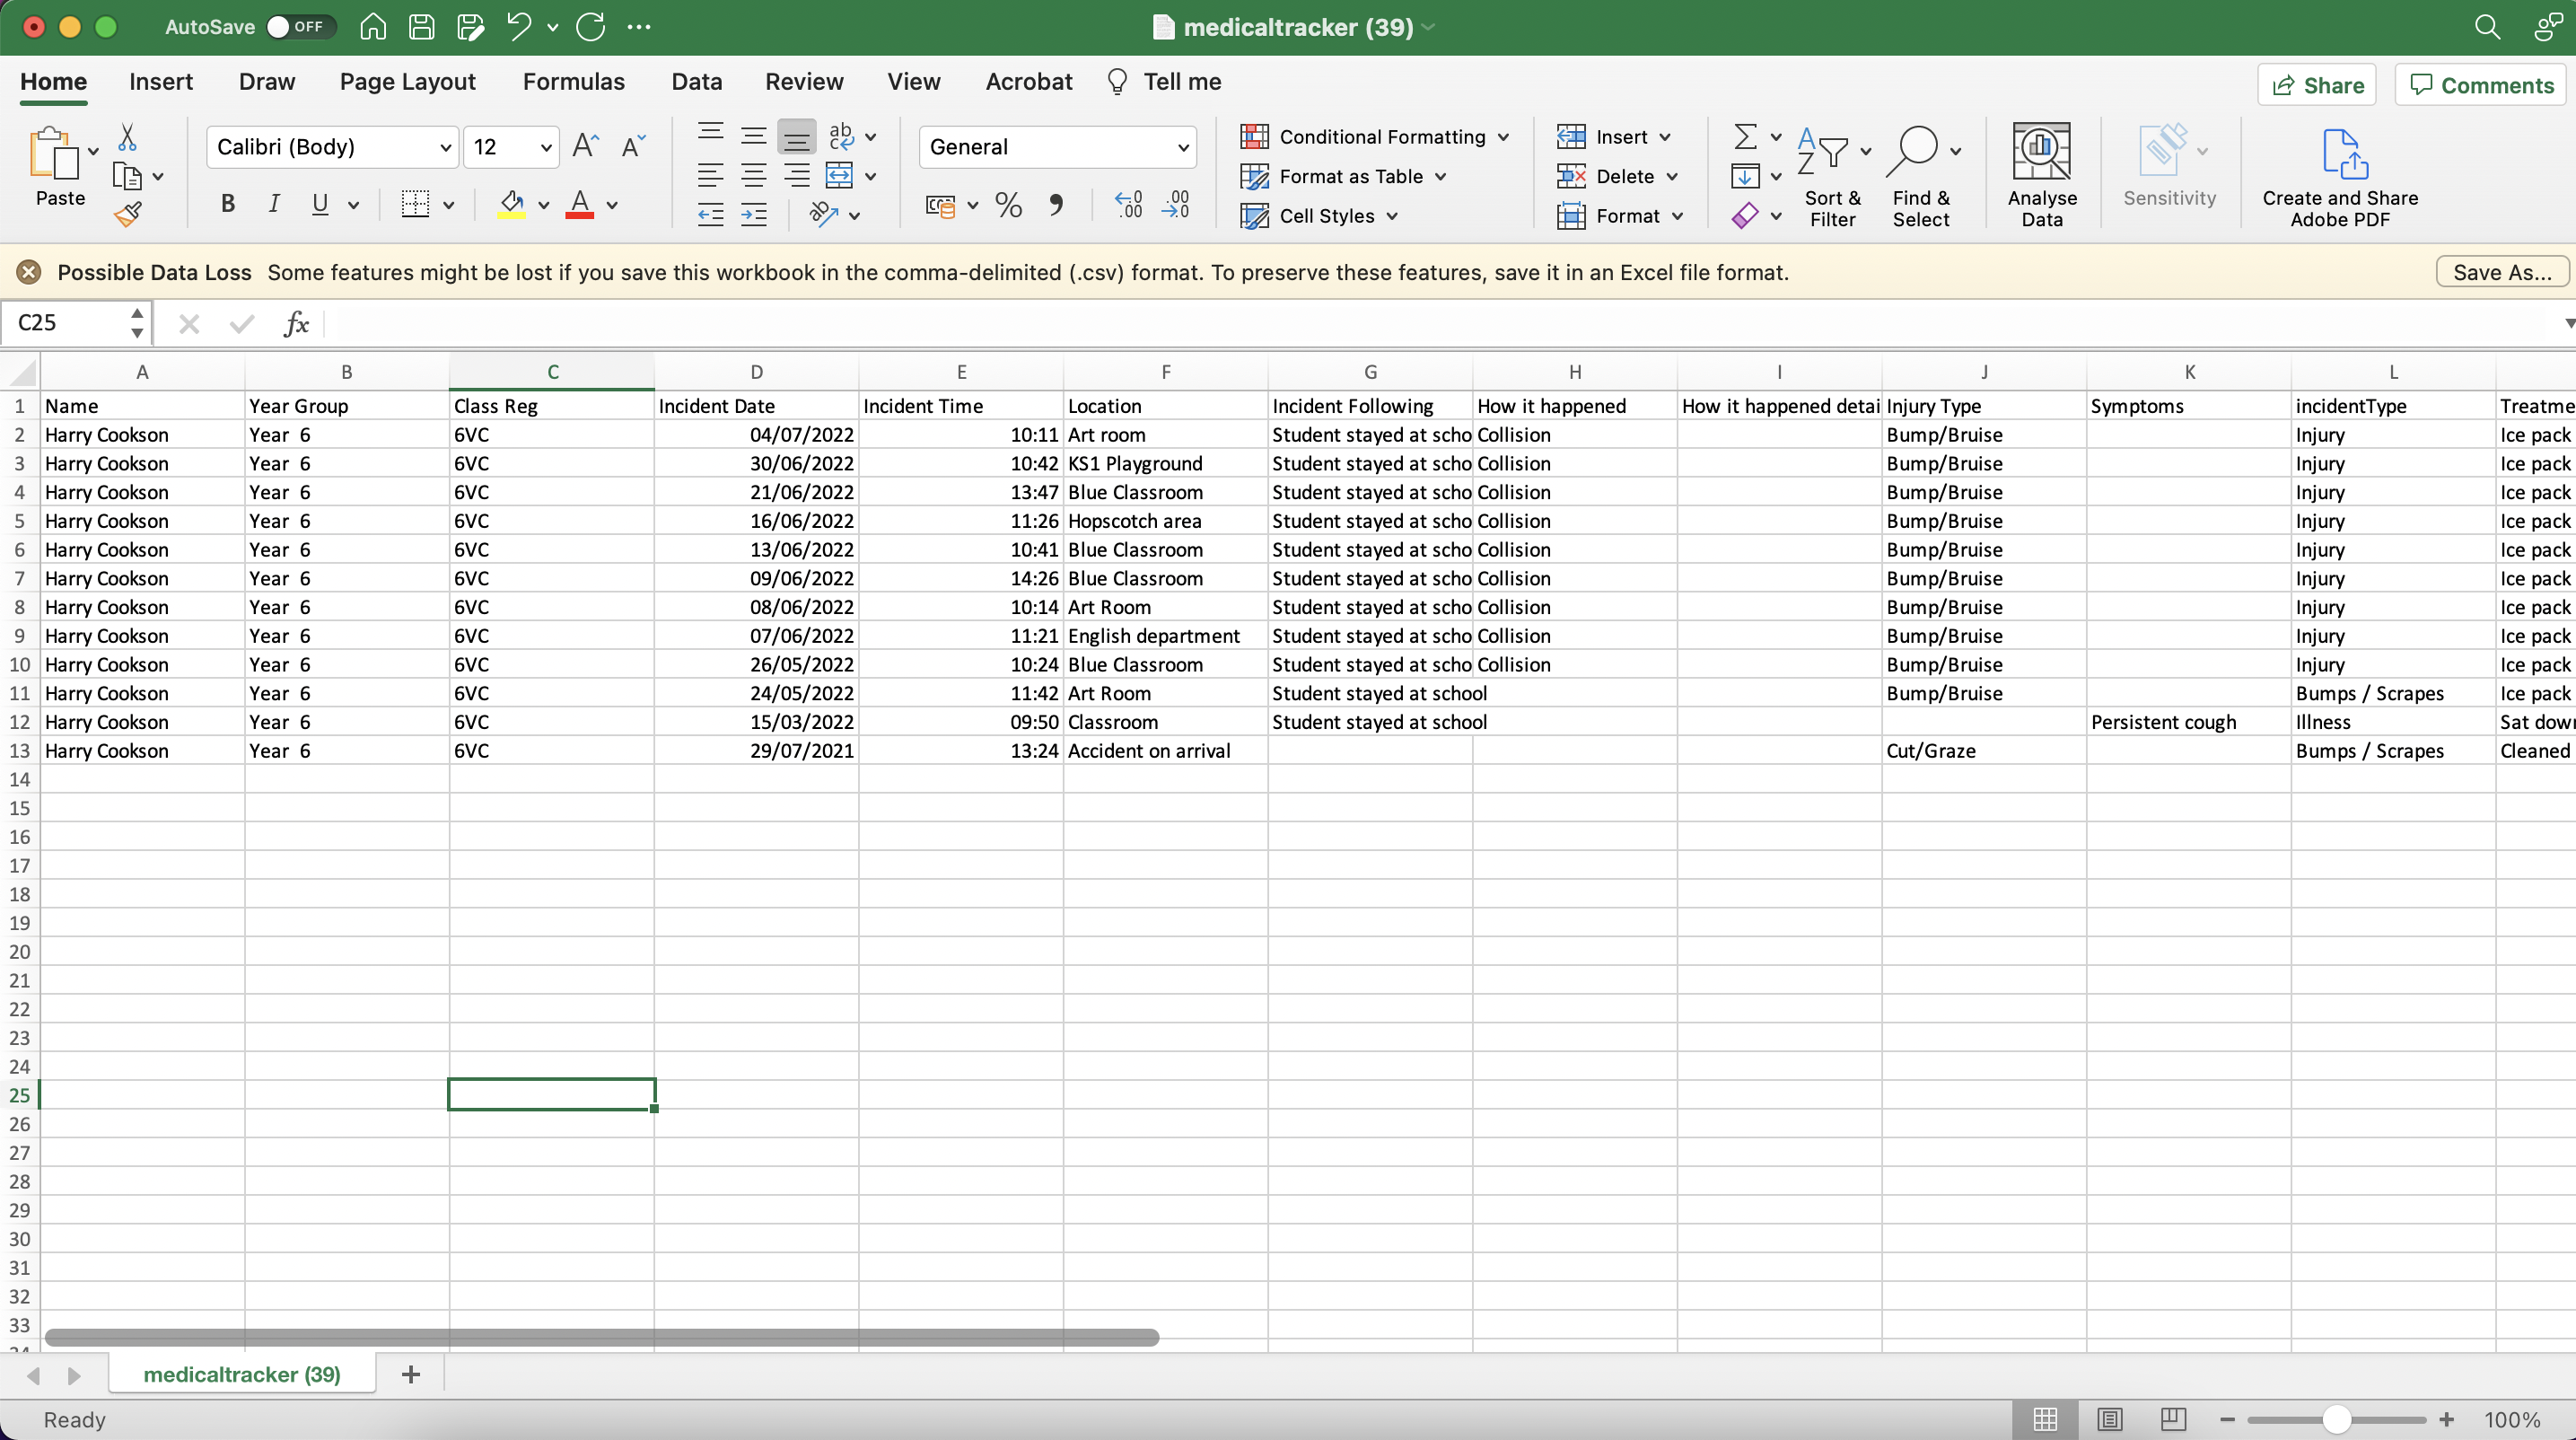
For example in the image below you can see that we have changed the date range, then you can click 'Download' and select 'Export to CSV'. You can also filter using the columns. 
This will then export to a .csv as you can see below:
Below we will go through a number of scenarios and detail how you would extract the data for each one:
GDPR Request / Subject Access Request from a parent/carer:
Tip: Within each of the following modules you will have to repeat the process below:
- Medication use
- Medication Stock
- Medical conditions
- Incidents
Step 1: Within each module change the date range back to the date you started using Medical Tracker. If you are unsure when you purchased Medical Tracker for your school change it back to 01 May 2015 (this is when Medical Tracker was launched)*
*Please note that in the 'Medical conditions' and 'Medication Stock' modules you will not have a date range so simply skip to 'Step 2'.
Step 2: Enter the student's name into the 'Student name' column
Step 3: Press the cogwheel and 'Export to .csv'
You will end up with four or five .csv files as your GDPR Data Request to give to the parent/carer.
Exporting all data from Medical Tracker for back-up purposes:
Tip: Within each of the following modules you will have to repeat the process below:
- Medication use
- Medication Stock
- Medical conditions
- Incidents
Step 1: Within each module change the date range back to the date you started using Medical Tracker or from the date you want to back up the data. If you are unsure when you purchased Medical Tracker for your school change it back to 01 May 2015 (this is when Medical Tracker was launched)*
*Please note that in the 'Medical conditions' and 'Medication Stock' modules you will not have a date range so simply skip to 'Step 2'.
Step 2: Press the cogwheel and 'Export to .csv'*
*Please note that within the 'Medical conditions' module you will have to repeat the process for the 'Archived' conditions
You will end up with four or five .csv files as your data back up
Exporting filtered data for a specific purpose - in this example we will use 'Students gone to hospital' in the academic year 2021/22:
When exporting data from Medical Tracker it will automatically only export the data you have filtered within the module. In this example, we are going to export all the injuries in the academic year 2021/22 that have resulted the student going to hospital.
Step 1: Go to the incidents module and click the 'Injury' filter on the left-hand side
Step 2: Change the date range to 01/09/2021 to 31/08/2022
Step 3: Filter the 'What happened next' column to 'Student went to hospital'
Step 4: Press the download and 'Export to .csv'
This will then export to a .csv as you can see below: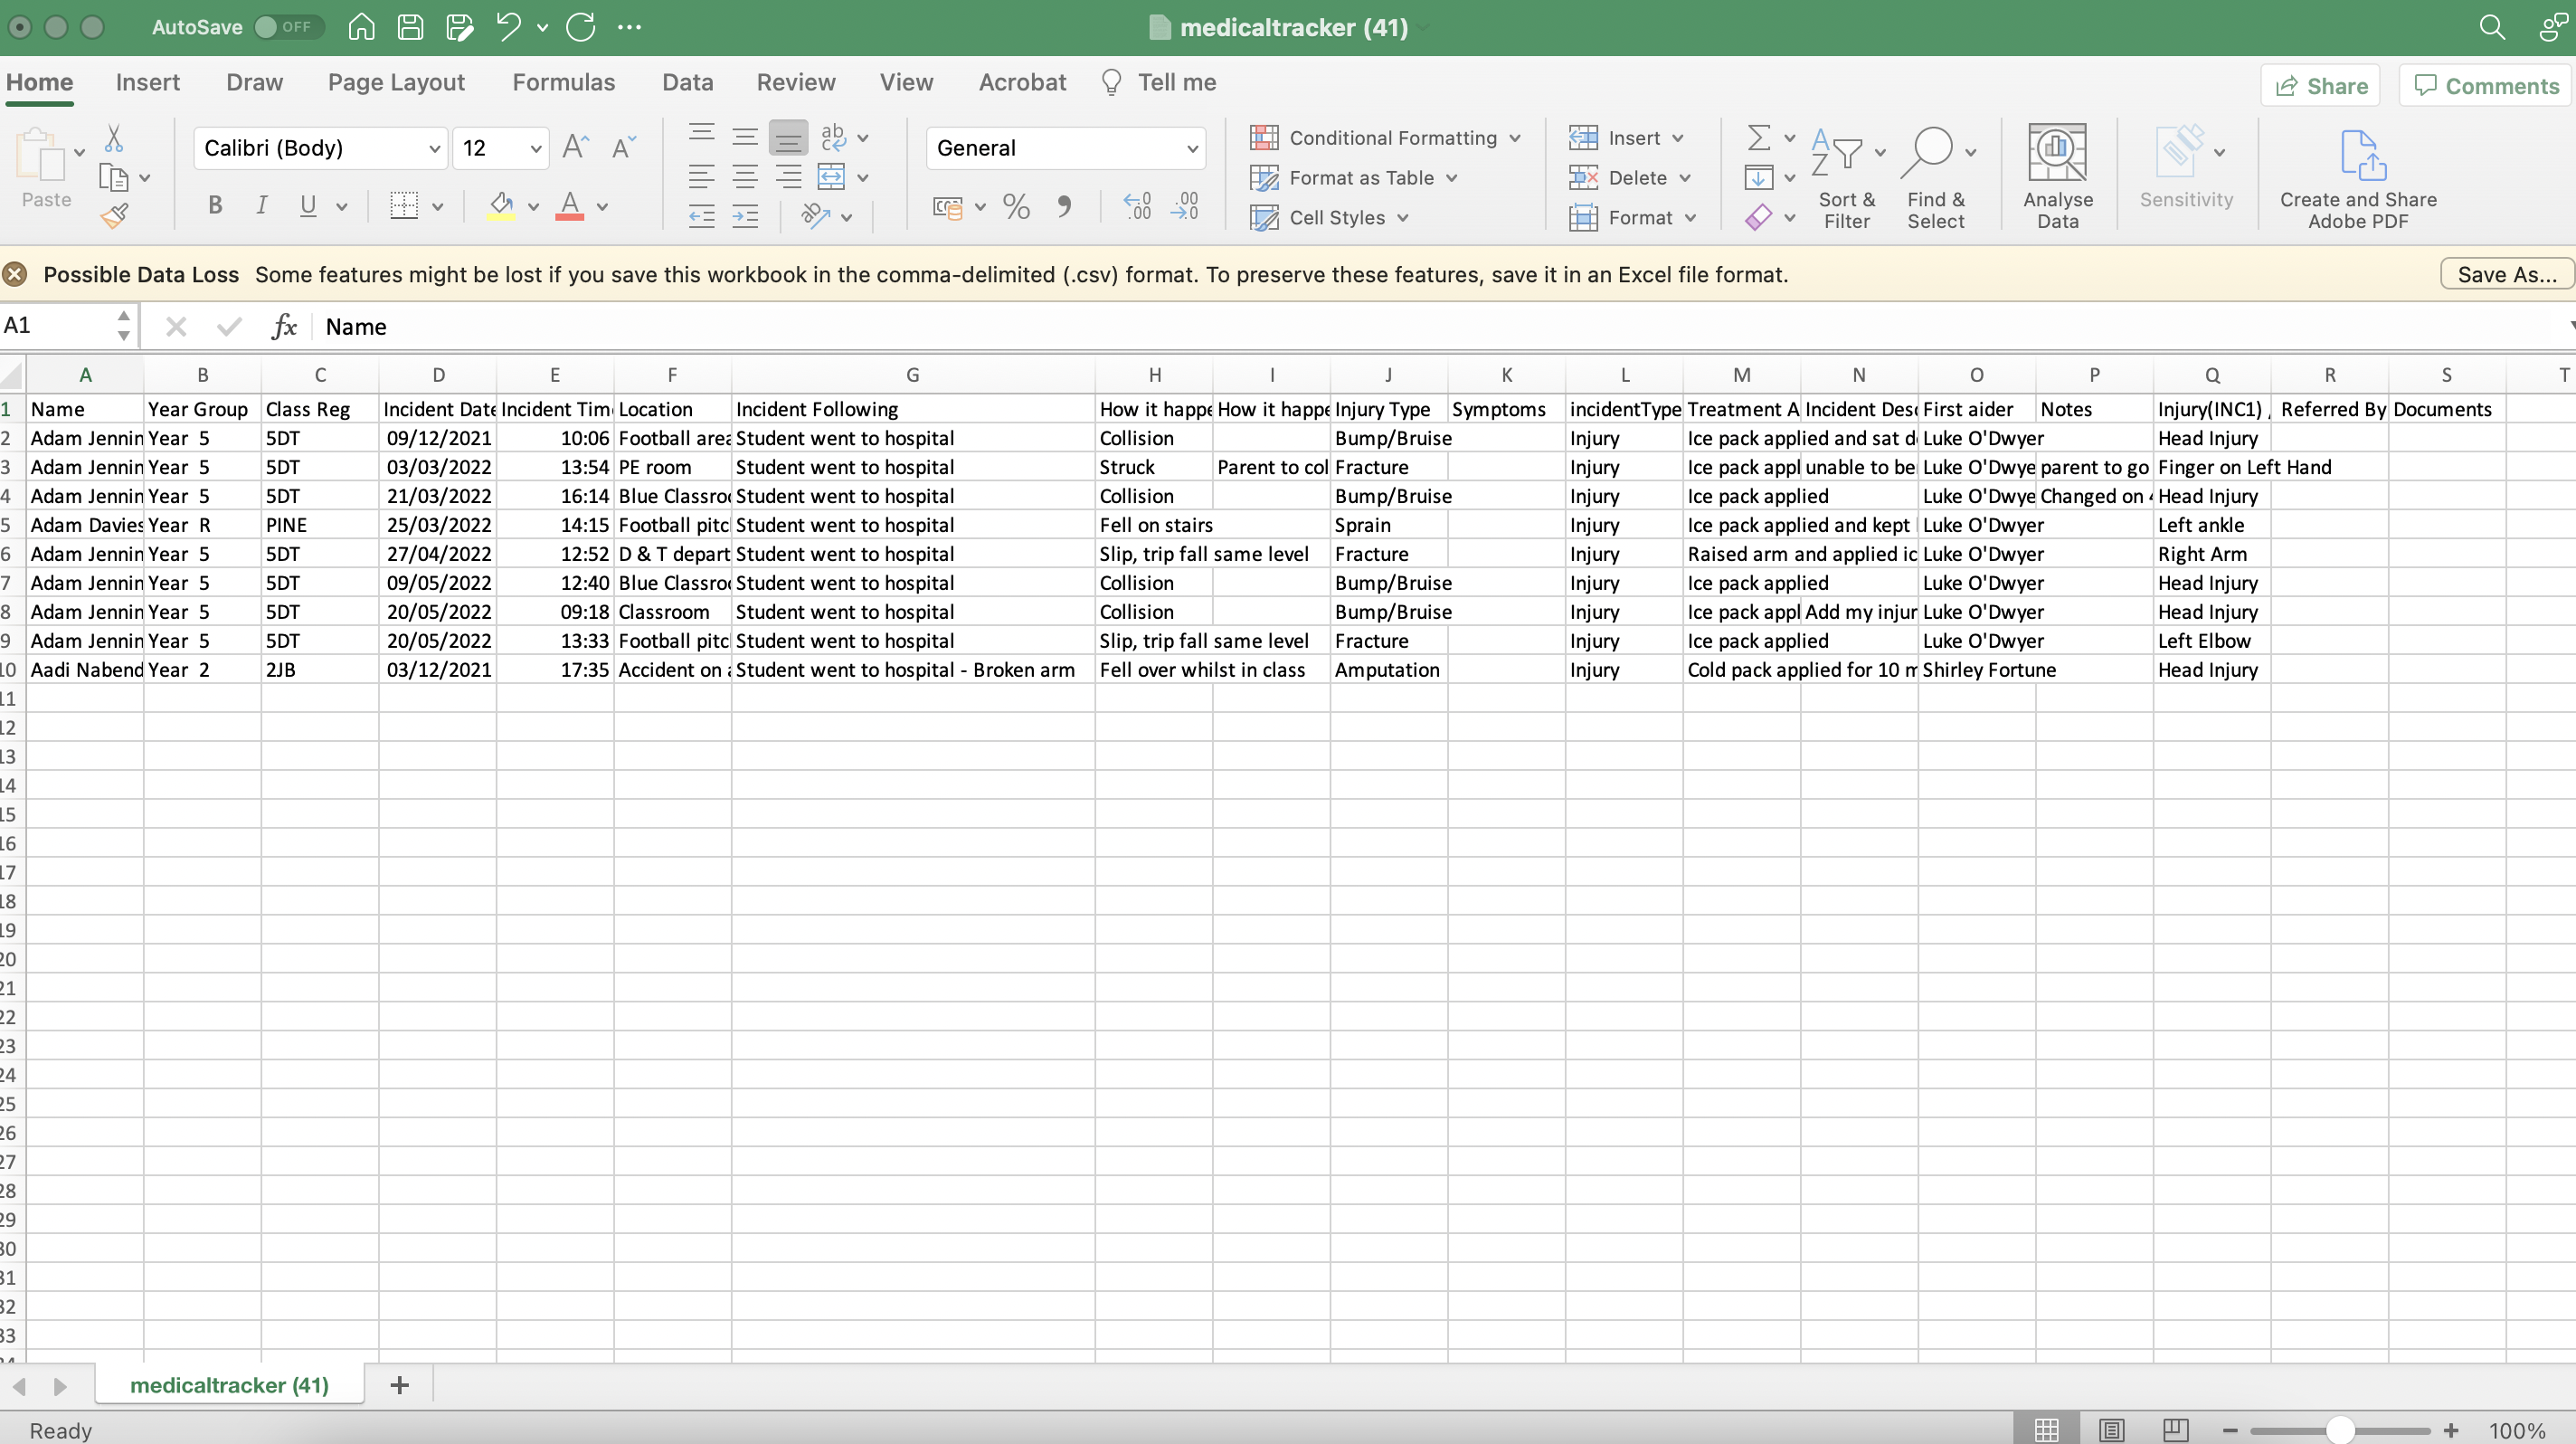
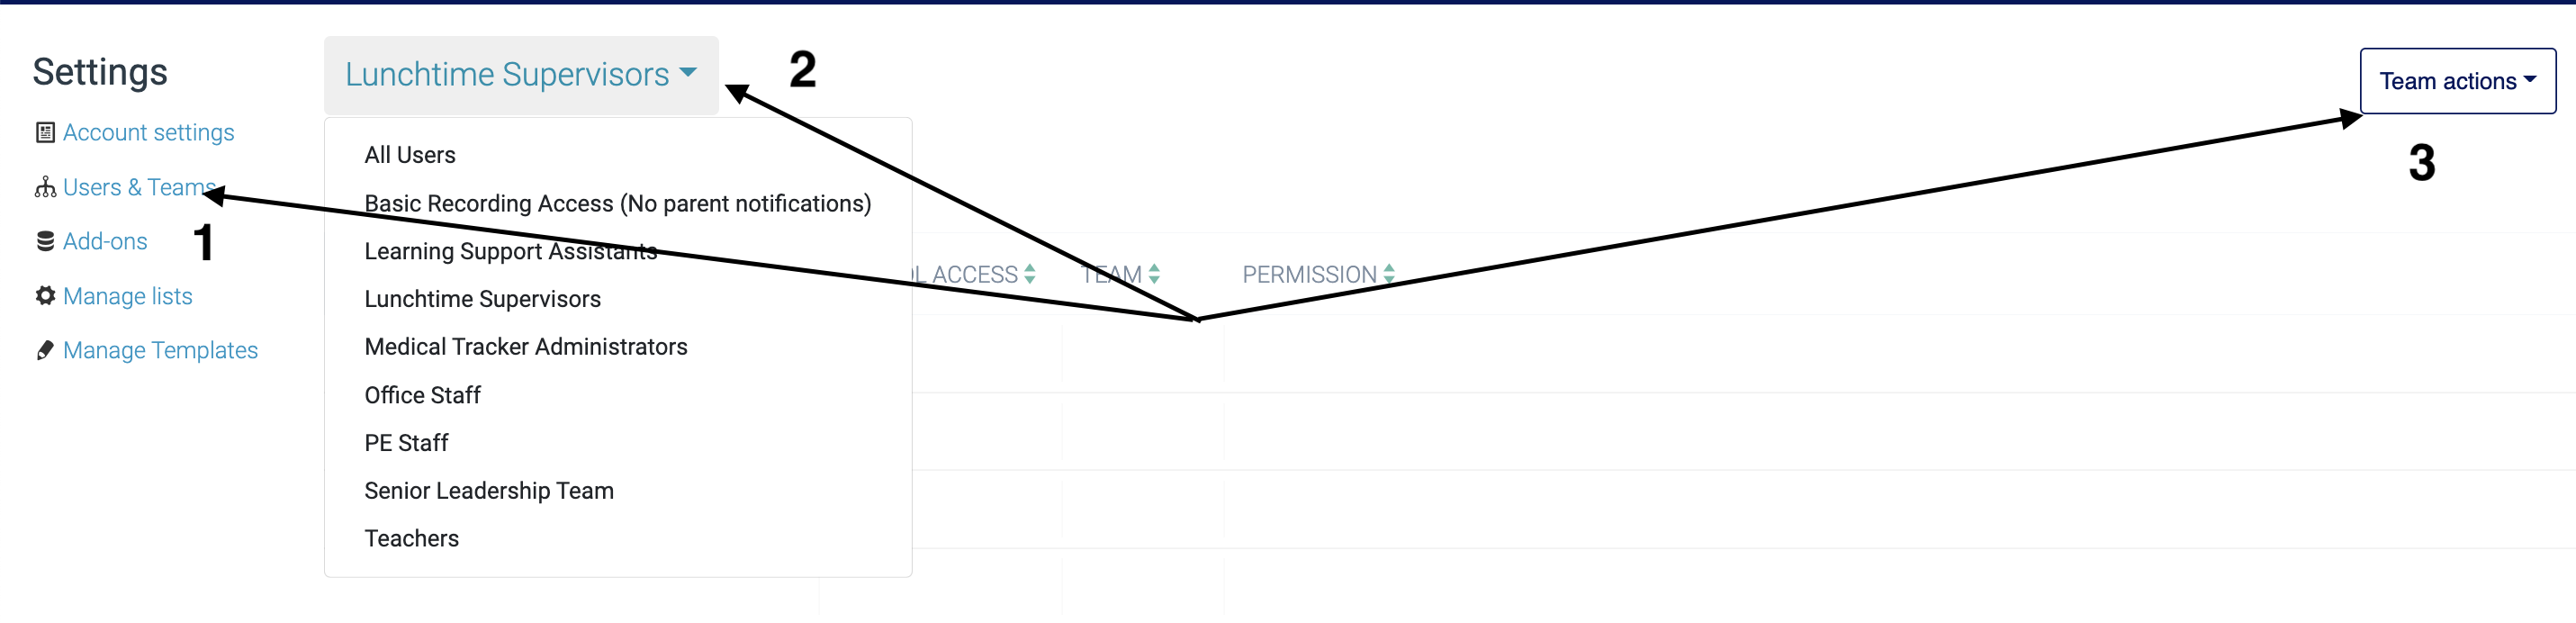
1. The ability to export data is a permission-based feature controlled within the team the user belongs to that is controlled within 'Settings' -> 'Users and teams'.
2. You will need to select the team the user/s are a part of
3. Select 'Team actions -> 'Edit team'
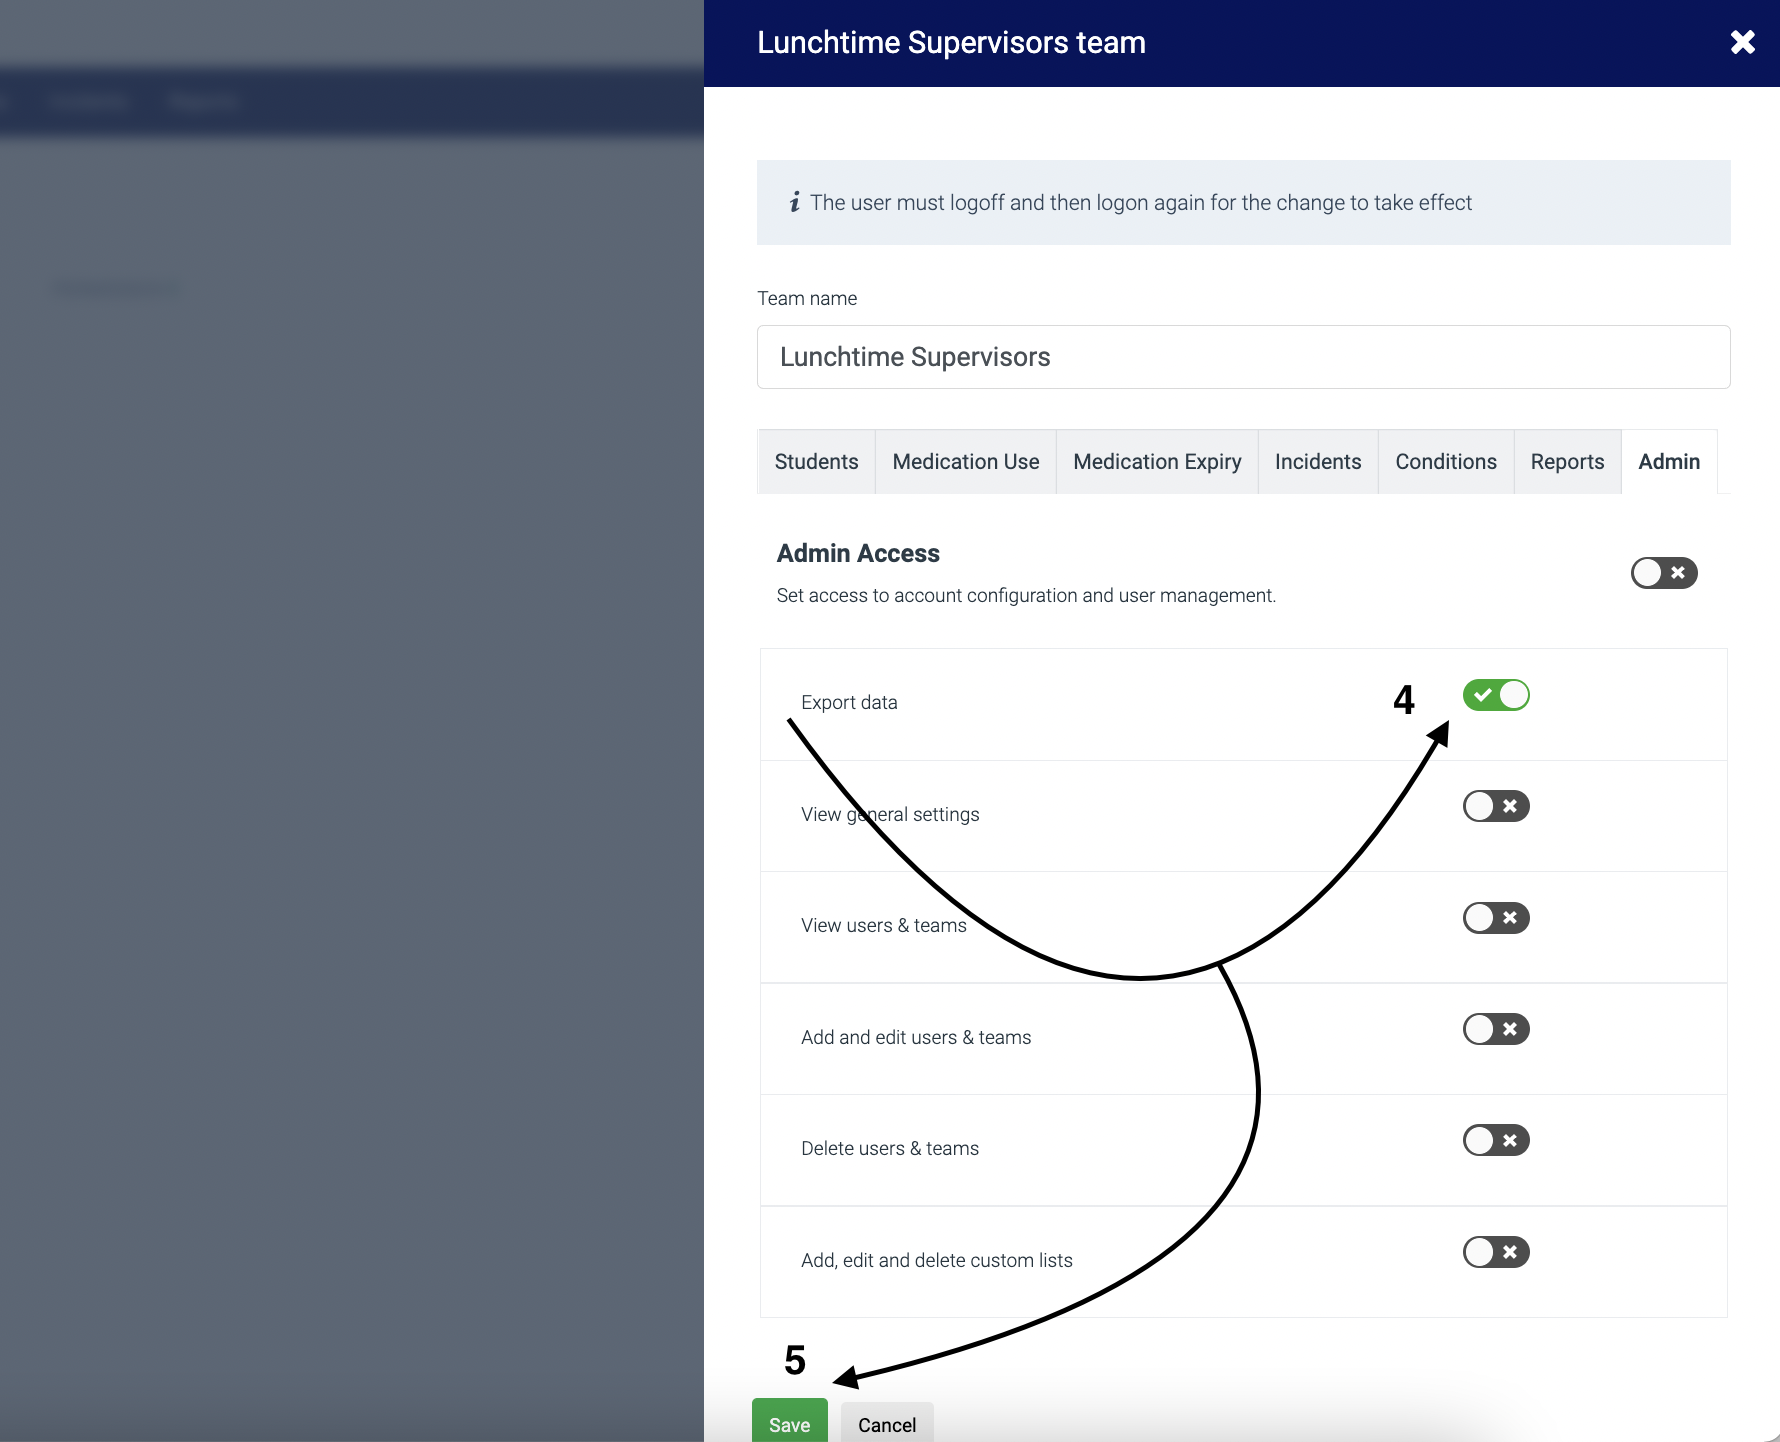
4. Within the 'Team' permission select 'Admin' and enable 'Export data'
5. Hit 'Save' - each user will need to log-out and log-in again for the updated permissions to take effect
If you have any feedback or questions, please reach out to our team by using our contact form. We're available 9am to 5pm Monday to Friday and happy to help!