![MT White Logo _ PNG-01.png]](https://help.medicaltracker.co.uk/hs-fs/hubfs/MT%20White%20Logo%20_%20PNG-01.png?height=31&name=MT%20White%20Logo%20_%20PNG-01.png)
Adding a new incident can be done through multiple routes.
Route 1.
You can now add new incidents from the main dashboard. As soon as you log into Medical Tracker you will now see a new 'New Incident' button. in Green on the top left hand side.
This will allow you to quickly select from each of the 'incident types' directly from the dashboard.
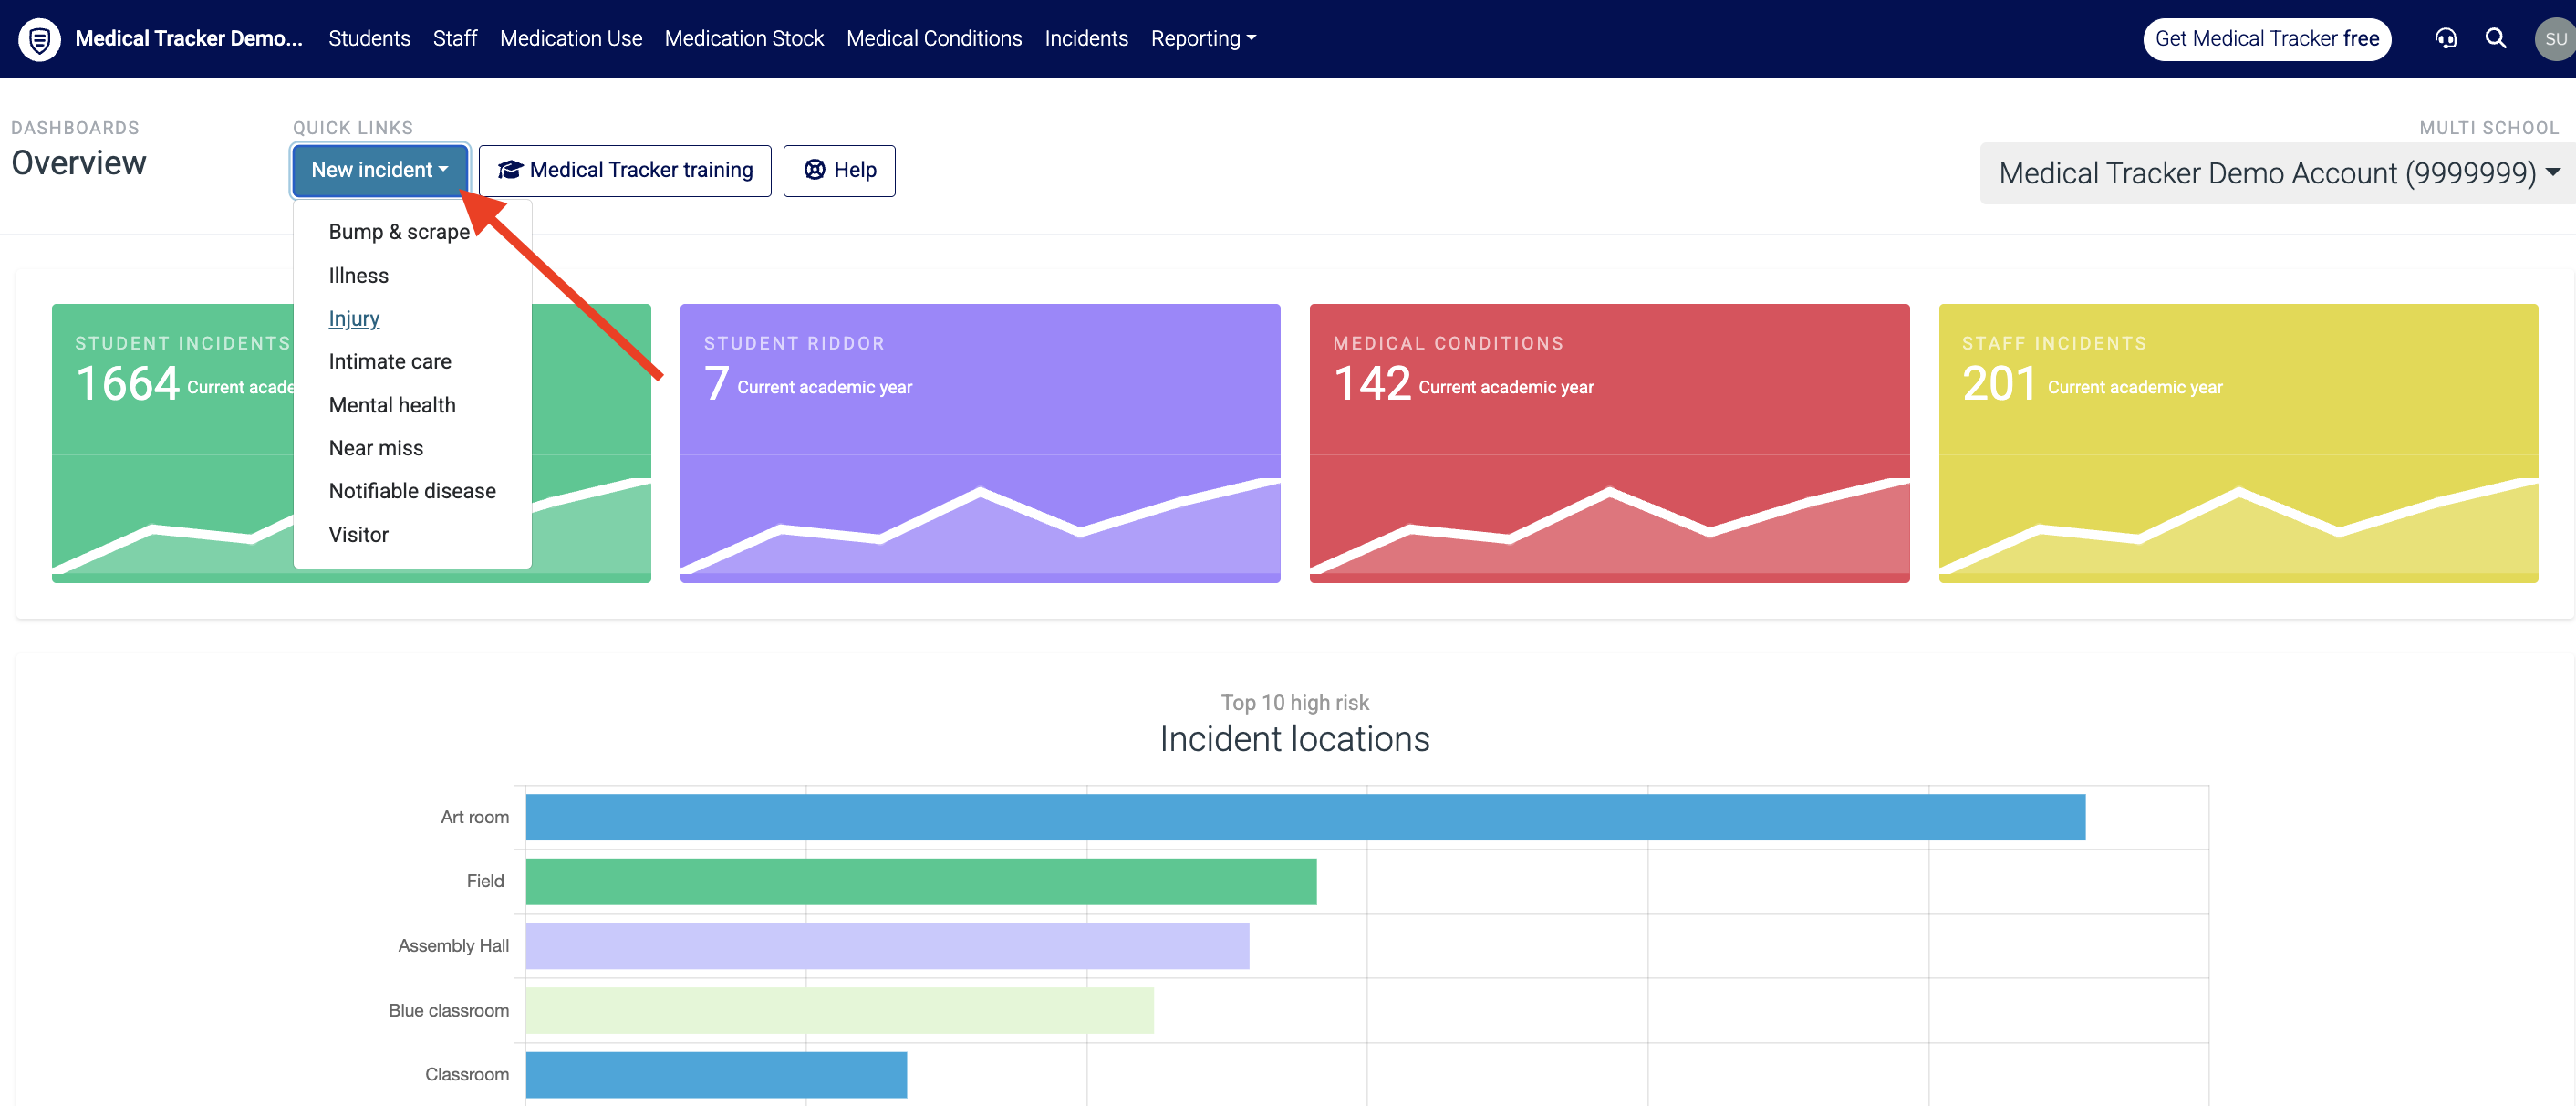
These are populated in alphabetical format and will take you directly to those specific forms.
Route 2.
You can still add a new incident through the 'Incident' module in the deep blue bar.
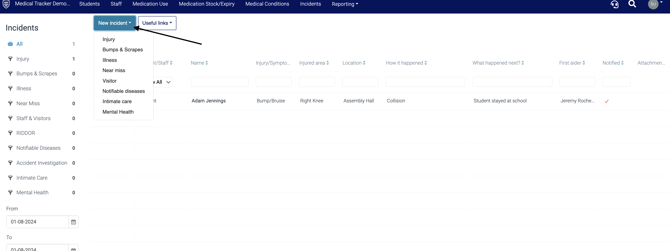
- Click the green New Incident button
- Select Incident type from the drop-down menu:
- Fill out the relevant details:
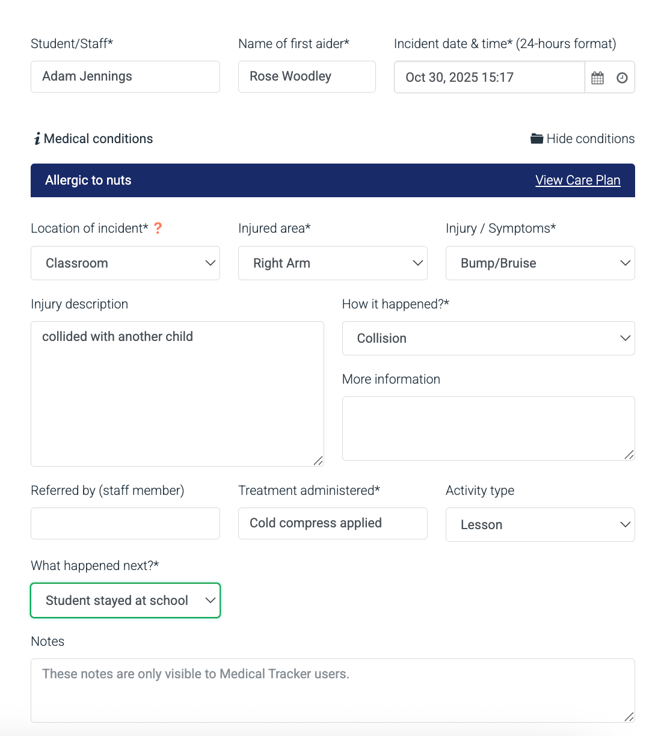
Tip: If the student has a medical condition, it will show the name of the condition on the form, so that you can click through to view any details in case they're relevant to the incident (see image above).
4. Click the green Save button
Note: some fields on the form are optional. You will see an asterisk (*) next to all required fields. If you've forgotten something, you won't be able to save the incident.
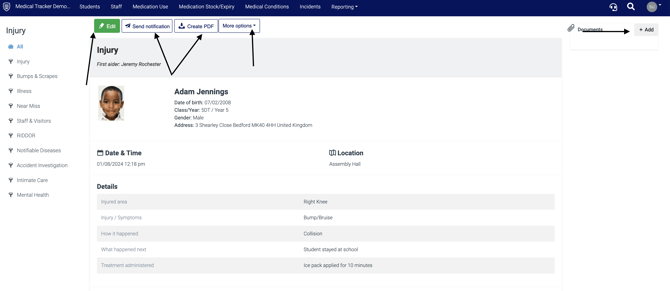
Once you've clicked Save, it will update and show you the incident record page. Here, you have different options for what to do next:
- Edit
- Send notification
- Create PDF
- More options - add witness statement, print, remove
- Add documents
Click on the below links to view the related help articles: